
There are many types of gardens you can have for your yard to make it more attractive in the neighborhood. Everyone knows that a nice, manicured lawn will go a long way to improve the overall look and appeal in any neighborhood.
Some of you may even have messy neighbors who don’t care about their lawn and having a fabulous garden could even offset the shabbiest of lawns. There are many types of gardens you could use for enhancing your lawn, but probably the simplest is the rock garden.
Rock gardens are a type of garden with an emphasis on rocks and stones with a few small plants that are found in naturally rocky areas. The plants are generally small and de-emphasized but are vital to help in the aesthetics.
Because the plants are native to rocky areas, they’ll be small and like their soil to be drier than most plants but can’t completely be without water. A popular type of rock garden is where bedrock is arranged to imply there was a bedding plane that had shifted or had come up partially above the ground.
Plants are arranged in this type of garden to hide joins between stones, whereas in its natural setting it would likely be one continuous piece. This type of professionally designed rock garden, or rockery, was popular in the Victorian times.
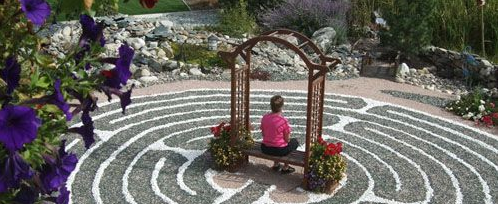
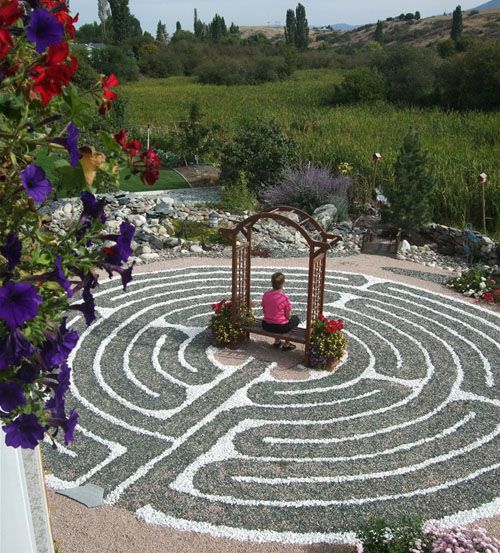
A Japanese rock garden, sometimes misnamed ‘Zen garden,’ is a sand box with sand, rocks, and very occasionally grass. The sand in these gardens tends to represent water, with the ridging caused by rakes to symbolize the ripples.
The rocks would then be islands. Some people believed these gardens were supposed to soothe the mind, but this was not the original intention. Understanding how to put together an effective garden for your terrain type would enhance your landscape.
Just because you don’t have fertile soil or lots of space without rocks, it doesn’t mean you can add to your landscape by having a garden. Even if your land is flat, you can bring in rocks for your rock garden. Just about every terrain type can support a rock garden.
But, before you start bringing in all types of rocks for your garden, you should consider what rocks are native to your area if you want to create a completely natural look. Also, you should consider only local plants.
Putting a few extra moments into the design of your garden can ensure you’re going to get compliments from your neighbors and be the talk of the neighborhood, and maybe even your town.
Since rock gardens are typically shallow and don’t require plants that need a lot of water if you’re going to include plants at all, then you can see that a rock garden can be a very low maintenance way to decorate your lawn.
In this case, a small amount of upkeep every week or even every month can keep your lawn decoration well-maintained for the neighborhood. After you bring in rocks, you should clear the land you’re going to use of debris.
You especially want to take care of the weeds since rock gardens look their best when the vegetation is low, clearing it out is essential before you begin your garden. In your garden you will typically want small piles of rocks with either no plants or very sparse plants to break up the scenery.
It will take time and practice to make sure you have the right balance between rocks and plants, but when you do manage to find that balance, it will be rewarding.
Designing a Rock Garden
Learning how to design a rock garden will arm you with enough design knowledge and inspiration to get out there and make your lawn more beautiful. There just as many ways to design your garden as there are rocks and plants that could go in your garden, but careful planning can ensure you have a garden that is aesthetically pleasing and will become a rewarding experience as your neighbors look on your yard with envy.
The first step in designing your rock garden is to look at your space. Every lawn has at the very least a ground surface. Some may include grass, weeds, trees, and other vegetation. If you have a section of your land that doesn’t have any vegetation, then this is probably a prime location for your rock garden.
A popular method of rock gardens is to take bedrock and theatrically show the bedrock jutting from the ground with a vegetation plane above it. In this arrangement, the plants are there to hide the cracks in the bedrock or even give an illusion to there being a single piece of bedrock, instead of lots of little pieces.
Another method is the Japanese rock garden. This method is usually just sand in a contained area with a few rocks, and designs traced into the sand with a rake. This can be very pretty and you could change the look as often as you wanted to.
After taking a look at your land, you should first choose any area that already doesn’t have anything growing on it. If you’re looking at a pile of dirt or a natural rockscape, then you’re in luck, because your pre-planning stage is done.
If you have a solid plane of grass all around your house, then your job is a little harder. You could use the rock garden to enhance your driveway or your walkway, or any way in between. Maybe you want to break up the land by having a rock garden between some shrubs or even if your location is completely bare except for the grass.
Clear the area of everything. You don’t want any accidental vegetation appearing in your rock garden because that would throw off the design. Then, you get rocks! But, not just any rocks. Consider your area and what rocks are indigenous to your area and get only those.
If you already have a rocky area in your yard it will provide an excellent start. You could consider breaking those rocks up and using them in another area of your yard. What about plants?
Well, consider what plants your area would have in rocky areas. These plants are typically small and need less water than other plants. If you’re going for the “mimic nature” approach, then your choice of plants will be limited as you’ll have to follow your area’s ecology to make sure you mimic accurately.
The best way to arrange a rock garden is to take a few rocks of random sizes, probably no more than five, and make some small piles with them. Don’t arrange the rock piles in a linear pattern as this is not the method in nature.
If you wish to add plants, then add them sparingly in between a lot of rock piles or even interspersed with the rock piles. Any vegetation in your rock garden should be deliberate. Then you’ll have your completed, low maintenance, lawn decoration.
Common Rock Garden Plants
If you’re going to have a rock garden with plants, the first step is choosing the right plants for you and your area. Probably the most important factor you’d want to consider when finding the right plants is the USDA zone.
The zone tells you how cold your coldest days would be and if a certain type of plant that can tolerate such temperatures. The only real information you would need to glean from the zones is that if you’re in an extremely cold area then you should choose an “any zone” plant. The other areas are probably going to be close enough for your needs.
Another concern should be the amount of sunlight you would get for the area. It does no good to put a plant in your garden that requires a lot of sunlight if it’s going to be in the shade. That’s just too much work to go through for it to die.
Finally, you should probably try to avoid using poisonous plants as they could have undesirable results for your garden and your family. Some plants are good all year round and in any zone. These plants are great because they can be added to any garden.
These include Basket of Gold and Green Carpet. Basket of Gold can also survive with only about three hours of sunlight but Green Carpet doesn’t need very much sun at all. Some plants that require a lot of light include Dwarf Yarrow, Stonecress, Rock Jasmine, Catsfoot, Rockcress, Sea Pink, Alpine Aster, Ice Plant, Whitlow grass, Mountain avens, Sulfer Flower, Spurge (poisonous), Alpine Poppy (poisonous), Dwarf Baby’s Breath, Evergreen Candytuft, Oregano (which, of course, is an herb so it’s good for cooking), Pasque Flower, Soapwort, and Speedwell.
If you have around three hours of sunlight per day then you can go with Sheep bur, Pinwheel, Carpet Bugle, Windflower (poisonous), Alpine Columbine (poisonous), Aubretia, Creeping Bellflower, Snow in the Summer, Alpine Pinks, Shooting Star, Hens and Chicks, Fleabane, Cranesbill, Trumpet Gentian, Coral Bells, Lewisia, Lithodora, Penstemon, Phlox, Northern Jacobs Ladder, Primrose, Saxifrage, Stone Crop, Cushion Pink, Blue Eyed Grass, Snowbell, and Woolley Thyme.
Of course, if you have no real sunlight available, then you can use Rockery Orchid and certain varieties of Northern Jacobs Ladder, Primrose, and Hens and Chicks. If you want really tall plants, then consider the Pinwheel, Windflower, Alpine Columbine, Shooting Star, Sulfer Flower, Coral Bells, Evergreen Candytuft, and Lewisia.
If short plants are what you’re after, then Sheep bur, Creeping Bellflower, Hens and Chicks, Trumpet Gentian, Dwarf Baby’s Breath, Green Carpet, Rockery Orchid, Stonecrop, and Woolley Thyme are up your alley.
No matter what your region and your climate you should always be able to find suitable plants for your rock garden. And if you make sure you match up your sunlight, temperature, and water requirements, then you should just about always have a maintenance free rock garden for your yard so that you and your neighbors can enjoy it. If you spent enough time planning, you could even start matching colors for your garden and create an even better eye-catching display.
Rock Gardens for Landscaping
Not every landscape is perfect and having a rock garden can help in many of those areas. You might have an area that is just too shaded and you can’t have plants because there just isn’t enough sun during the day to help them grow, or you may have an area that has become too dry because you’re either going through a drought or rain just won’t reach it.
Or, maybe you have too much rain and your land is just too soggy to support good vegetation and has now become very swampy. Rock gardens can help in all of these problem areas and most are very low maintenance.
Good planning can help any novice to rock gardens, but sometimes a professional’s opinion can be the difference between ordinary and magnificent. If your land is too rocky, then you can just clear up some of the rock and try to arrange what is left in an aesthetically pleasing pattern.
Adding some shallow rooted plants can help break up a large, rocky area with some green. Or, if the area is too dense with rock, then you could build a border around the area with an artificial border, such as railroad ties – or use small plants to trace around it.
A hilly area on your land will cause your soil to erode. Placing a rock garden in a strategic area of your land will stop the erosion and while adding a good lawn decoration. Bringing in rocks indigenous to your area will give the illusion that the garden is more natural.
An area that is just too dry or maybe has non-fertile soil is another suitable place for a rock garden, and maybe you should even consider a Japanese rock garden. This kind of a garden uses sand and rocks to put patterns into the ground and if you have an extremely dry climate, this will look intentional despite having a bad spot in your yard. Some people will tend to call a Japanese rock garden a “Zen garden” but the two are not the same.
Shady areas can have a rock garden with plants that thrive in the shade. Instead of having plants that are found naturally around rock, you would take plants that do well in the shade and populate your garden with those. It’s a great way to expand on the rock garden concept and have a more personalized decoration.
No matter what your land is like you can always benefit from a rock garden. Do you have a lot of land? Let’s examine mowing. If you have some of your vast land mass broken up by rock gardens, then it would decrease the amount of mowing you have to do but at the same time would make your land more beautiful.
Breaking up your land doesn’t mean you don’t care about your land as much if you don’t tend to every corner of it, but it does mean that you are able to be more time efficient and give your attention to other parts of your land. You could have other projects for your land such as a waterfall or other type of water feature that would go well with rocks.
Finally, do you remember pointillism from art class? Artists would use tiny dots made with brush strokes to make large pictures, as in Un dimanche après-midi à l’Île de la Grande Jatte by Georges Seruat. He painted with a lot of dots in that painting (and others as well), and you could do the same with a lot of stones. Make your lawn an art gallery of rock garden paintings.
Rock Garden Ponds and Waterfalls
Just about anyone in the word can build a great rock garden pond and waterfall because it’s really inexpensive to do and doesn’t require very much instruction. Having a pond as a centerpiece to your rock garden will make your landscape stand out.
The important thing to keep in mind here is that for a novice, you will have to contend with a lot of engineering because it really isn’t “simple” to have a pond that doesn’t leak. The first thing you should consider is the land.
Since you’re going for a pond and waterfall, you’re going to need lots of space for it. Find some good level land and clear away all of the debris and vegetation. You also don’t want it to be near drain pipes or rain run-off so that you keep your pond safe from contaminates.
If you build your pond too close to trees, you’ll have to continuously take dead leaves and other tree matter. Putting your pond in a place where it will get a lot of direct sunlight will aid in plant growth.
Once you have your land set aside, you’re going to need to decide what kind of pond you’d want. Do you want to have fish or plants in the pond? If you make your pond too small, then it could be or become uninhabitable for your fish and plants.
It’s almost better to have too large a pond that one that is too small. It would be very difficult at best to make enough room for your vegetation. Now that you have decided where you want your pond, you’re going to cordon off the area so you can visualize your project better.
Trace the area you want by driving a stake in the ground, then tying adjacent stakes together with some nylon cord. When you have the entire area cordoned off, dig down about six inches for the first shelf. This is called the coping shelf.
Then dig down twelve more inches and this is your second shelf and about another six inches for the base of the pond. You have these different shelf positions because you’re going to have different fish and plants at each level. A larger pond is going to be more stable and easier to keep without worrying about your plants and fish dying off.
After you’ve dug your hole, fill it with soft sand and pack it down really tightly. You want about a one half inch thickness with the soft sand. Going to a home improvement store or a pond supply store would probably be the best bet to find materials for your pond at this point.
You’ll need a pond liner, and you can usually determine your pond liner’s size by taking the largest length and width, then calculating the depth and twice what you dug. This will ensure you have the size of pond liner you’ll need.
After removing your shoes, take the liner you bought and lay it on the bottom, then work it into the shelves you made. Be careful to follow the contours of the pond. After you have lined the entire pond, then it’s time to fill it.
The waterfall is usually bought as a kit. You’ll want to decide the best way to integrate the waterfall into the pond. Most of the shops where you buy the waterfall will have books on how to do this type of integration.
Along the border of your pond, pile small rocks and stones along the outside of it and on some of the other shelves. This is to trap the liner so it doesn’t get unattached and ruin your little pond. Now you can add plants and fish to add to the attractiveness of your pond.

CONCLUSION;
Remember; having the right information will make your job much easier and can help ensure the lasting success of your garden. Did you get your free copy of the E-book ‘Absolute Organic Gardening’? It goes into far more detail there.
If not, Click Here! to get your free copy in seconds.
Plus! … Take the Free! ‘Absolute Organic Gardening 21 Day Challenge’ Here!
If you don’t initially see what you’re looking for here, please use the ‘Search Bar’ in either the Sidebar or Footer.
And please don’t forget to sign up to the ‘CheckFred Community Newsletter’ via the form below …….. Thank You.

![]() Click The Button Above To Visit
Click The Button Above To Visit
‘The CheckFred Merch Shop’