The Difference A Day Makes

I don’t know about You, but I find as each year passes, rose bushes seem to keep you in suspense as long as they can. Two days ago, (Wednesday 24th May 2023) I went out in the evening to just capture three roses that had popped out to greet us.

Then this morning, (Friday 26th May 2023) after a day of unusually hot sunshine (For the UK) They really started to flourish!

Hopefully, this is a good Omen for the rest of the Veg, Lavender and Rhubarb to follow suit this year, as last year was a washout! Good luck to You ALL this year … Let’s hope it’s a bumper one EH?

How To Get Yourself Composting Successfully.

Easy Guide to Composting

Making your own compost can be an economical way to use kitchen scraps and yard waste, and it is a natural means of keeping your yard, garden, and plants healthy. If you’d like to get started composting, here are some simple guidelines.

How Much?

Before you begin, sit down and think about how much compost you need, how much kitchen and yard waste you generate, and what kind of space you have. Depending on these factors, you’ll need to decide whether or not you want to go with indoor or outdoor composting, whether or not you want to use worms, and whether or not you want a bin.

Take the Free! ‘Absolute Organic Gardening 21 Day Challenge’  Here!

Indoor composting is recommended for people whose space is limited, such as those with small houses and yards or apartment dwellers.

Worms are often used in small, indoor compost systems.

For those with larger outdoor areas, compost bins can be built outdoors for little money and effort. You can also compost without a bin and simply make a pile in a sheltered corner of your yard.

Build the Bin

If you are going to compost indoors, you will need a container of some sort, and worms are considered essential for indoor composting. You can purchase a ready-made worm composting system, or you can make your own by poking holes in an opaque, plastic container and setting it on a drainage tray. The worms initially feed on wet, shredded newspaper; then you begin adding kitchen scraps and more newspaper. The worm bin should never be allowed to get below 55 degrees.

For an outdoor bin, a low-cost, easy method is to use wooden packing pallets. Most stores that receive shipments in these slatted containers are fine with people taking them (use packing pallets are usually discarded). You just need four of the pallets to make an open-topped square to hold your compost. You can wire or nail them together; just make sure one side is easily removed so you can access the compost.

Piles of Compost

If you don’t want to build a bin, you can just make a pile of yard and kitchen scraps. You will need to turn it often to keep its heaped shape, but this basic method can work. It seems to work best if the compost pile is against a house or other building.

Compost Care and Feeding

Excepting dairy products, fish and meat, you can put most kitchen scraps into your compost, including egg shells, tea leaves, and coffee grounds. Any organic matter from your yard can be added, such as hay, straw, cut grass, leaves, mulch, wood chips, and slender prunings from shrubs. You can also add a modest amount of shredded newspaper. Any paper, however, takes longer to decompose.

If you have chickens, the cleanings from their coop can be added to the compost. Chicken manure makes the compost rich and full of nutrients. However, the waste from other pets (dogs, cats, etc.) should not be added to compost.

Turn your compost once a month or so, stirring to aerate it and get the top layer down into the middle.

Water your compost briefly with a garden hose if the weather is very dry. Better yet, water it with rain water from a rain barrel.

CONCLUSION;
Remember; having the right information will make your job much easier and can help ensure the lasting success of your garden. Did you get your free copy of the E-book ‘Absolute Organic Gardening’? It goes into far more detail there.
If not, Click Here! to get your free copy in seconds.

Plus! … Take the Free! ‘Absolute Organic Gardening 21 Day Challenge’ Here!

If you don’t initially see what you’re looking for here, please use the ‘Search Bar’ in either the Sidebar or Footer.

And please don’t forget to sign up to the ‘CheckFred Community Newsletter’ via the form below …….. Thank You,

Pete.


Landscaping Design Ideas

Click The Button Above To Visit
‘The CheckFred Merch Shop’

Top Tips – How To Dry Flowers

How to Dry Flowers

Depending where in the world you live, The end of summer will soon be here. And even though you may have enjoyed the beauty of your flower gardens all summer long, you may be wondering how to enjoy the blooms long after summer has ended. Learning how to dry flowers can be the answer to your dilemma.

Dried flowers may not be as fragrant as fresh cut flowers, but they can be as beautiful. Dried flowers can also be a great way to decorate your home by bringing the outdoors inside. Decorating with dried flowers is also less expensive than using silk and you can dry your summer flowers at home.

This article will give you a list of the best flowers to dry and explain how to dry them so you can enjoy them for a long time.

The best summertime flowers for drying include:

* Baby’s breath
* Bachelor’s button
* Cockscomb
* Larkspur
* Roses
* Sage
* Statice
* Strawflower
* Yarrow

You can also dry cat-tail, iris, milkweed, lotus, poppy and Queen Anne’s lace.

Take the Free! ‘Absolute Organic Gardening 21 Day Challenge’  Here!

Pick flowers which don’t have brown edges or those which have been eaten by insects. You also don’t want misshapen flowers as part of an arrangement so you’ll want to leave them in the garden. Flowers won’t look better after they’re dried than they do when they’re fresh, so you want to choose the best flowers possible.

Choose flowers which are only partially opened. The flowers will continue opening during the drying process. Gather more flowers than you think you’ll need for the dried arrangement. This will ensure you have the right number of flowers in case some don’t look as good as you’d like.

One way to dry flowers, and often considered the easiest, is to hang a group of flowers upside down in a somewhat dry, warm and dark area. Be sure the location is dry because excess moisture can cause the flowers to mold. Expect for the flowers to take at least two to three weeks when you hang them to dry.

You can also use your microwave to dry flowers. With this process you’ll need to purchase desiccating pellets which can be found in the floral section of most craft stores. You may also be able to purchase some from floral supply stores.

Find a microwave-safe container and put a layer of the pellets on the container and microwave them for about three minutes. This will dry them out completely. Then pour the dried pellets into a bowl about an inch deep.

Trim the flowers and place them into the bowl so the stem is standing up in the pellets. Then pour more pellets over the blooms until they are completely covered. Microwave the flowers for two to five minutes. Leave the flowers in the microwave for longer if they are larger blooms.

After the flowers have cooled for at least 20 minutes, pour the crystals off the blooms. Clean the petals until there are no pellets remaining. Using floral wire, tape the flowers to the wire and create your arrangement.

You can expect the flowers to look darker after they’re dried than they were cut fresh. Once they are dried they can be used to decorate your home. Now you realize drying flowers isn’t difficult, you may decide to try to dry other flowers than the ones on the above list.

CONCLUSION;
Remember; having the right information will make your job much easier and can help ensure the lasting success of your garden. Did you get your free copy of the E-book ‘Absolute Organic Gardening’? It goes into far more detail there.
If not, Click Here! to get your free copy in seconds.

Plus! … Take the Free! ‘Absolute Organic Gardening 21 Day Challenge’ Here!

If you don’t initially see what you’re looking for here, please use the ‘Search Bar’ in either the Sidebar or Footer.

And please don’t forget to sign up to the ‘CheckFred Community Newsletter’ via the form below …….. Thank You,

Pete.


Landscaping Design Ideas

Click The Button Above To Visit
‘The CheckFred Merch Shop’

Planting Your Spring Vegetable Garden


Grocery prices continue to skyrocket along with fuel costs. It’s times like these when you want to grow your own. Learn how to plant your spring vegetable garden by following these guidelines.

Before you can begin a garden it helps to know what growing zone you’re in. If you live in the United States, you can go to the National Gardening Association’s website (www.garden.org/zipzone/) to find the USDA Hardiness Zone Map. This map will help you find which zone you live in and give ideas on when it is safe to start planting.
Or if you’re in the UK, check out Ourshttps://www.rhs.org.uk/

You’ll also want to prepare the ground before you can begin planting. Do this by tilling the area you have planned for your garden. You’ll want to remove the clumps of grass as much as possible or till deeply to incorporate the organic matter into the soil. Test the soil to determine if it has the right mineral content. Tests can be obtained at County Extension Agencies and home and garden stores. Add any nutrients to the soil ‘before’ you begin planting.

Growing your first garden is much easier if you start with seedlings rather than growing your own. If you do plan to grow your plants from seeds, you’ll want to start them indoors about eight weeks before they can be planted in the ground. Purchase the plants you want and keep them indoors until your area has reached the last average frost date.

When the ground is workable, the first vegetables you’ll want to add to your garden are spinach, peas and onions. Onions are sold in sets and you may be able to find seedling spinach. You can plant the pea seeds directly into the garden. You may be able to plant lettuce, beets, carrots, cilantro, dill, radishes, cabbage and broccoli about two weeks before the last frost. Celery, kale and potatoes can also be grown outdoors.

When you know there’s no chance of a late frost, you can plant melons, squash, cucumbers and beans. Tomatoes, peppers, eggplant, pumpkins and basil can also be planted at this time. When you plant corn, set out at least four short rows rather than one long row because they pollinate properly that way. You’ll also want to use poles or trellises for beans. Tomatoes, peppers and eggplant are best transplanted or purchased as plants prior to setting them in your garden.

If you follow these guidelines and learn how to plant your own spring garden, you may have produce in as little as four weeks. Take time to pull weeds and keep your garden watered but not muddy. As the produce is ready to harvest you’ll be enjoying the fruits of your labour on your kitchen table.

CONCLUSION;
Remember; having the right information will make your job much easier and can help ensure the lasting success of your garden. Did you get your free copy of the E-book ‘Absolute Organic Gardening’? It goes into far more detail there.
If not, Click Here! to get your copy in seconds.

Plus! … Take the Free! ‘Absolute Organic Gardening 21 Day Challenge’ Here!

If you don’t initially see what you’re looking for here, please use the ‘Search Bar’ in either the Sidebar or Footer.


Landscaping Design Ideas

Click The Button Above To Visit
‘The CheckFred Merch Shop’

.

Why Gardening Is Good for Your Health and Life


Gardening is a fantastic activity in many ways. It’s a great form of exercise, stress reliever, creative outlet, and just plain old good fun. Studies have shown that regular exposure to nature and fresh air is good for us. Not only will you feel energized and refreshed after a gardening session, but you’ll also feel a great sense of achievement.

Here are a few other reasons why gardening is a great all-around exercise:

#1 – Stress relief. Many of us lead very stressful lives. Gardening is a good way of relieving that stress. It’s a quiet, gentle activity that also helps you connect with nature and clear your mind. There’s something very nurturing about getting close to the earth and having a part in helping something grow.

#2 – Great for joints and flexibility. As we get older, so do our joints and mobility. Gardening is a great option for keeping your joints supple and flexible without too much pressure. Simple exercises like bending, lifting and light digging will help your flexibility and muscle tone. All of this will lead to improved health and quality of life.

#3 – Keeps you busy. If you already have a busy schedule then gardening may be something you fit in on the weekends or in short spurts. However, if you’re out of work or retired, keeping a garden is a great way of staying active, fit and healthy. You’ll also feel a wonderful sense of achievement when you see the fruit of your labor.

#4 – Great social activity. Gardening is becoming increasingly popular. Many people are joining community garden projects and schemes. This is a great way to bond with your community. It’s also a fantastic opportunity for swapping home-grown produce and teaching your kids and family about healthy eating. Gardening is a great link for friendships. It’s a good way to meet like-minded people doing something you enjoy.

#5 – Great for children. Children are naturally geared to love gardening. They have an inbuilt instinct for connecting with the earth around them. Give a young child a small shovel and a vegetable patch and they may happily dig for hours. Exposure to gardening also shows kids the importance of food and healthy eating, as well as caring for their environment. Many schools now have gardening clubs and projects to help children get involved as gardeners too.

On the surface gardening seems like a great health activity, and it is, but there are also many other wonderful benefits. Along with getting plenty of fresh air and exercise you can relieve stress, make new friends, show your kids the importance of our environment and keep your joints and muscles supple. It’s a fantastic all-around activity to enjoy.

CONCLUSION;
Remember; having the right information will make your job much easier and can help ensure the lasting success of your garden. Did you get your free copy of the E-book ‘Absolute Organic Gardening’? It goes into far more detail there.
If not, Click Here! to get your copy in seconds.

Plus! … Take the Free! ‘Absolute Organic Gardening 21 Day Challenge’ Here!

If you don’t initially see what you’re looking for here, please use the ‘Search Bar’ in either the Sidebar or Footer.


Landscaping Design Ideas

Click The Button Above To Visit
‘The CheckFred Merch Shop’

.

How To Maintain Your Garden Pond.

Garden Pond Maintenance 101

Many people have installed garden ponds at their homes. They add interest to the garden, encourage wildlife to visit the garden, and provide a place for peace and contemplation. Using these garden pond maintenance 101 tips, it won’t be long before your pond is ready for spring’s visitors.

Ponds require regular maintenance. The better care you take, the longer your pond will be enjoyed by your family. There are things you should do during each season of the year, but here’s how you can ensure your pond is ready for the spring.


Landscaping Design Ideas
* Remove the de-icer or heating unit from the pond. Replace the filter and pump, then turn them on.

* Remove any leaves or decomposed organic material. Keep an eye out for algae and remove it as soon as you can.

* If the water appears black, remove at least one-third of it and then replace it with fresh water.

* Purchase the beneficial bacteria, chemicals, and water conditioners you’ll need for the spring and summer. Now would be the time to decide on any new items you’ll add to your pond as well.

* Check the level of the water in your pond and add a small amount at a time so the water temperature or the chemical balance isn’t disrupted too drastically. If you wintered your fish indoors, increase the water and chemical level before returning the fish to the pond.

* Begin feeding the fish once the temperatures reach or exceed 50 degrees Fahrenheit. Since any fish you might have in your pond are cold-blooded, they’ll begin getting interested in eating once their body temperature rises.

* Check the netting around the pond and repair it where necessary.

* Reset any rocks around you’ve placed around the border as well as prune the shrubs and any plants which are around the pond. You may also want to add new plants or features to the pond.

* Clean the filter as recommended by the manufacturer, being sure to clean the water intake more often to keep it from becoming clogged with debris.

If you take the time to care for your pond the way it requires, you’ll be able to enjoy it for years to come. Pay attention to any organic matter that falls into the water and clean it out. You’ll also want to remove any fish which may die.

What else can you do to benefit from your pond throughout the year?
You may want to place a bench so you can sit near the pond watching the fish. Another option would be to set up a canopy swing. Then take the time to sit outside by the pond to enjoy being outdoors among nature.

CONCLUSION;
Remember; having the right information will make your job much easier and can help ensure the lasting success of your garden. Did you get your free copy of the E-book ‘Absolute Organic Gardening’? It goes into far more detail there.
If not, Click Here! to get your copy in seconds.

Plus! … Take the Free! ‘Absolute Organic Gardening 21 Day Challenge’ Here!

If you don’t initially see what you’re looking for here, please use the ‘Search Bar’ in either the Sidebar or Footer.


Landscaping Design Ideas

Click The Button Above To Visit
‘The CheckFred Merch Shop’

.


How To Choose Which Garden Pond Idea Is For You

Small Garden Pond Ideas

People often use landscaping and flower gardens to beautify their yard. Perhaps you’d like to use something different. Why not try some of these small garden pond ideas and see how distinct they can make your yard appear.

Consider where you might like to place a small garden pond. Some people choose an area away from their homes while others choose to create a garden near their porch or patio. Which window would allow you to look out over the garden pond and enjoy the wildlife that may gather there?


Landscaping Design Ideas
You may only want to have a rock pond. This is a pond which has plenty of natural rocks and plants around them but won’t necessarily contain fish or other animals. These are mostly for beautification and to entice nature to come into your yard.

Other people want to have a small garden pond which already has life in it. Most people think about putting Japanese Koi in their garden ponds because they’re a hardy fish. You can choose from other fish as well – Shubunkin goldfish and Comet goldfish are often sold for garden ponds. Start with a fish that is at least 3 inches long with a caudal fin. They come in a variety of colors.

Take time to do some research about pond fish. There’s a science to knowing how to take care of them. Depending upon the weather and water temperature, the fish will be more or less active and their appetite will also change. Feed the fish more during the warmer weather and much less when the temperatures drop.

You could hire someone to design and build a small garden pond, although this is one DIY project everyone in the family can pitch in and help with. Depending upon whether or not you put fish in your pond, shade is important. You’ll also want to consider the condition of the soil in your yard, and the elevation. Rocky or hilly terrain could make some modifications necessary, so keep those in mind.

Always – And I Mean Always, keep your pond ‘fish safe’ and ‘child safe’.
Even if you don’t have children yourself, other people’s children will ‘wander’ as if magnetised towards water. There are too many cases of children drowning in ‘other people’s garden ponds’. Plus! there are many wild-life-predaters out there that would just love your fish to be on the menu at ‘any’ time of the day or night.

Be sure to invest in some heavy netting or mesh so that you can still see and appreciate your fish and the pond, but will keep out the enemy (and the children).

Plants to include in a garden pond include floating plants such as water lilies and water hyacinths. You can also find other aquatic plants to add to the pond. Again, plants are important should you have fish in the pond, because they will need someplace to get out of the direct sunlight.

Pond kits are available at most home improvement stores but it isn’t really necessary to buy one. You can choose the location for the pond, dig out the area, and then place a thick, plastic pond liner into the hole. Cover the liner rim with natural material such as rocks or logs. Make the pond look as natural as you can and it will definitely be something beautiful for you and your family to enjoy.

Remember that you’ll also need to filter the water and keep the pond clean. Rock ponds may take more care keeping them clean because you’ll have to remove the water and rocks each year. If you choose to add a waterfall feature, a pump will be necessary. The pump will help keep the water clean and circulating so the amount of maintenance required is reduced. The best way to ensure the waterfall doesn’t fail is to have a second pump and filter system on hand in case the primary pump breaks down.

Adding a water feature can make all the difference in how your yard looks. These small garden pond ideas will give you some place to start, and then you can research more to decide what type of pond is right for your budget and yard.

CONCLUSION;
Remember; having the right information will make your job much easier and can help ensure the lasting success of your garden. Did you get your free copy of the E-book ‘Absolute Organic Gardening’? It goes into far more detail there.
If not, Click Here! to get your copy in seconds.

Plus! … Take the Free! ‘Absolute Organic Gardening 21 Day Challenge’ Here!

If you don’t initially see what you’re looking for here, please use the ‘Search Bar’ in either the Sidebar or Footer.


Landscaping Design Ideas

How To Make Your Wild-Life Friendly Garden

Making Your Garden Wildlife Friendly

Having a garden that is friendly to wildlife and therefore entertaining in it’s own right does involve certain techniques and approaches to lawn care, some of them unconventional. The perfectly-groomed, square-cornered lawn with the carpet-like grass that never gets above 2 inches tall is not, unfortunately, the ideal environment for wildlife. So you may need to re-think things a bit to make your yard attractive to wildlife! Here are some tips.

What Kind of Wildlife?

First, identify what kind of wildlife you want in your yard. Bees? Deer? Birds? Making this decision early on will help you be able to be more focused in your yard care and design. Also, another first step you’ll want to take is determining what kind of wildlife is in your area. Then you can tailor your yard to fit the needs of local wildlife.


Landscaping Design Ideas

Let It Go

It’s been said that mowing, trimming, weed-killing, and other typical yard care regimens may actually repel most wildlife. If possible, let your yard or a part of your yard simply go to weeds. You could fence it off and label it “For the Birds” or some such if you are worried about what the neighbors will think. But many sources say that simply leaving an area of your yard alone and letting nature re-claim it can make a nice area for attracting birds, bees, and small animals. Adding a ‘Bug Hotel’ in the form of a simple pile of small or larger scraps of old wood, metal, twigs and branches will entice the little heebie-jeebies to feast on all that lovely decaying stuff, and the other wildlife will call in to get their breakfast and supper 😉

Water

No matter what kind of wildlife you want to invite to your yard, water is important. Every living thing needs it and is attracted to it. Ground-dwelling animals like chipmunks enjoy water sources placed on the ground, whereas birds appreciate water sources a bit higher up (making it safer from predators).

Make sure the containers are heavy enough to accommodate an animal’s weight on the edge, and putting a rock in the center also helps to weight the container and to provide a safe “island” in case a small animal goes in too deep. Sources say water should be no more than about 2 inches deep, and that you should empty the water container daily and refill with fresh water.

Although refreshing all the time deters the little Water-Bugs that other wildlife love to feed on. Just topping-up daily will ensure that the water stays ‘alive’ for all and birds/wild animals cope very well with mucky water. Hence the title – ‘Wild-Life’ 🙂

Provide Food

There are several different ways to do this. You can hang out a traditional bird feeder, invest in deer feed, or plant fruiting shrubs or other plants that provide food for foraging animals. Some plants to consider are:

* Sunflowers (many birds like sunflower seeds)

* Flowering and fruiting shrubs, like cranberries, blueberries, elderberry, and raspberries will attract birds and small animals. They may even attract bears and deer.

* Flowering and fruiting trees such as dogwood, hawthorn, and conventional fruit trees such as pear and cherry attract birds.

* Flowers such as Echinacea (purple coneflower), thistle, and black-eyed Susan appeal to small, seed-eating birds like wild canaries and finches.

You might want to invest in a notebook to record what creatures visit your yard once you begin making it more wildlife-friendly, and always have your smart-phone/camera to hand so that you can ‘capture’ those surprise moments in an image or video when something unusual vists your garden.

CONCLUSION;
Remember; having the right information will make your job much easier and can help ensure the lasting success of your garden. Did you get your free copy of the E-book ‘Absolute Organic Gardening’? It goes into far more detail there.
If not, Click Here! to get your copy in seconds.

Plus! … Take the Free!  ‘Absolute Organic Gardening 21 Day Challenge’ Here!

If you don’t initially see what you’re looking for here, please use the ‘Search Bar’ in either the Sidebar or Footer.


Landscaping Design Ideas

Why Grow Organic Herbs for Personal Medicine?


“There is a need for modern medicine and science to turn its attention to the plant world once again to find new medicine that might cure cancer, AIDS, diabetes, and many other diseases and conditions.” – Norman R. Farnsworth, Ph.D., Professor of Pharmacology at the University of Illinois at Chicago.

It’s really surprising that Western medicine hasn’t fully embraced the healing properties of plants. Especially since many of our drugs are derived from plants. Morphine is produced from the poppy plant, Foxglove produces digitalis, and even the most common of medicines: aspirin, is produced from willow bark.


Landscaping Design Ideas

And it’s not just these old standbys. Research continues to discover the many healing properties available in nature. Taxol is an important cancer drug which was discovered in 1971 and approved in 1993 for medical use. It is used to treat a variety of cancers and was isolated from the Pacific Yew Tree.

And these are just a few examples. It seems that Western medicine recognizes the power of medicinal plants, but only if they’ve been tweaked in a lab. While other societies, still use plants and herbs in their unadulterated forms. – ‘The Top 52 Health Hacks’ >> Here!

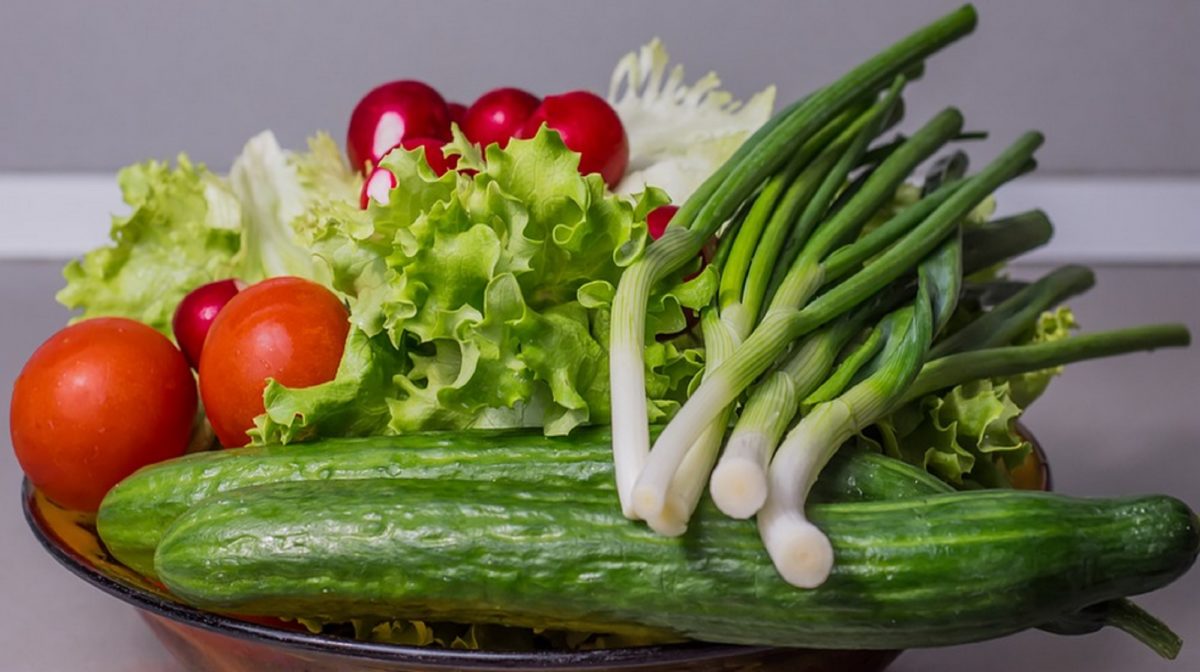
Traditional healers around the world, from curanderos and shaman to so-called “witches”, have known for centuries which plant treats which condition. Their history, passed on over centuries, serve as a reminder that there is still much to discover about healing.

While you may wonder why someone would resort to plants when there are pharmaceutical alternatives, consider that a study published in the Journal of the American Medical Association in 1998, estimated that 100,000 Americans die from taking prescription medication.

In 2013, a more recent analysis estimated that approximately 128,000 Americans die each year from the complications of taking prescription medicines. These are people taking properly prescribed drugs in the correct way.

This is not to say that herbal remedies don’t have side effects. They do, and it’s important to research and discuss these options with your physician. But, in most cases, the adverse outcomes are much less serious than those produced by laboratory-produced drugs.

In fact, after practicing traditional medicine for many years, physicians have started pursuing alternative therapies which focus on natural, plant-based treatment.

Dr. Andrew Weil, a Harvard-trained physician, realized that alternative medicine offered safer alternatives to mainstream prescription drugs and treatments. Other doctors have also pursued studies into integrative medicine which include extensive training in herbal medicine.

3 Ways Herbs Outperform Traditional Pharmaceuticals:

1. They tend to be less toxic: All the drugs listed above were produced by isolating an active ingredient and developed into a potent form. This high potency increases the risks of toxicity and side effects. Consuming an herb in its natural form, whether it’s a leaf or root, offers a lower dose of the active ingredient.

2. Herbs contain multiple ingredients — Plants contain multiple active ingredients which work in harmony to make them more efficient. The exact mechanism of this process is often a mystery to medical science, for example in the case of red yeast rice.

Red Yeast Rice is the fermented product of a fungus. It contains a substance called monacolin K, which is the ingredient in lovastatin, a commonly prescribed statin, or cholesterol-lowering drug.

Studies have shown that red yeast rice lowers LDL cholesterol by 30%, despite the fact it contains relatively low doses of monacolin K.
Scientists don’t know for sure, but they suspect that red yeast contains 8 additional types of monacolins, plus additional plant compounds such as isoflavones and sterols.

3. Fewer Side Effects — In many cases, herbs cause fewer side effects than their pharmaceutical counterparts. One example is St. John’s Wort which is often prescribed for mild depression. It has been extensively studied and shown to be more effective than a placebo, and as effective as some prescription anti-depressants. Again, it’s important to check with your doctor as St. John’s Wort can interfere with some medications.

CONCLUSION;
Remember; having the right information will make your job much easier and can help ensure the lasting success of your garden. Did you get your free copy of the E-book  ‘Absolute Organic Gardening’? It goes into far more detail there.
If not, Click Here! to get your copy in seconds.

Also; You might like to get your copy of – ‘The Top 52 Health Hacks’ >> Here!

If you don’t initially see what you’re looking for here, please use the ‘Search Bar’ in either the Sidebar or Footer.